
This is a quick summary of how to create a COM+ application in C# and use it from PowerShell.
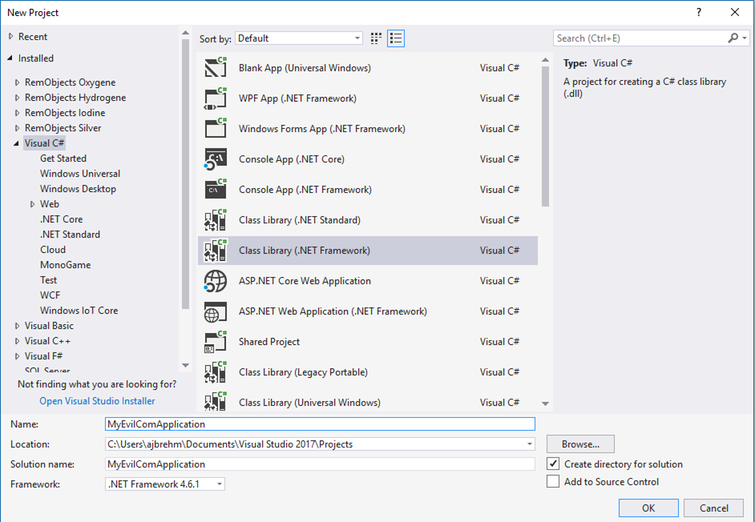
Step 1
Create a new Class Library project like so:
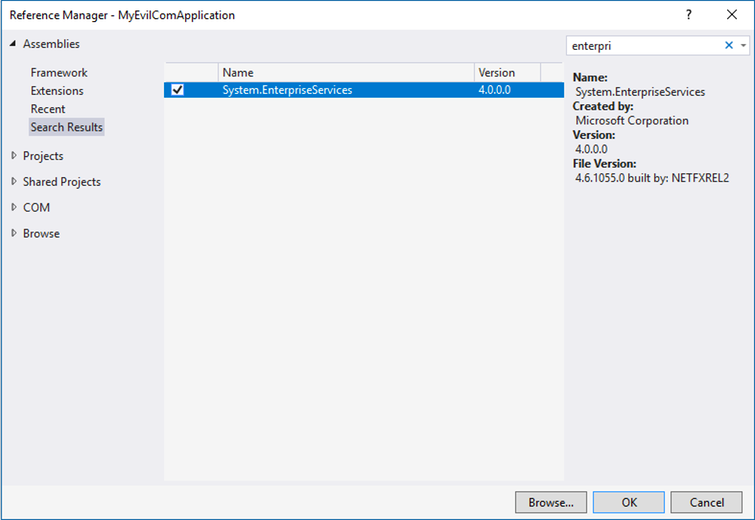
Step 2
Add a reference to System.EnterpriseServices to your project.
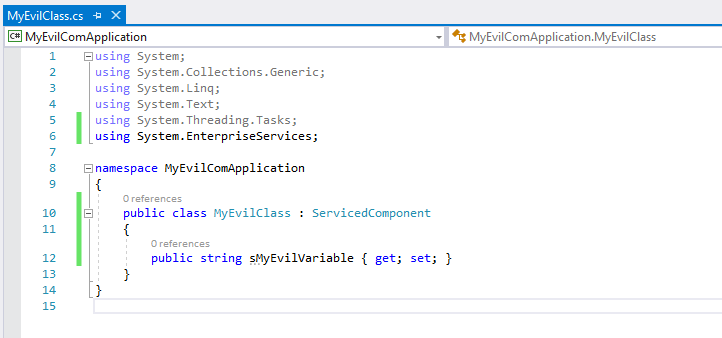
Step 3
Create a class. Make it a child of the ServicedComponent class.
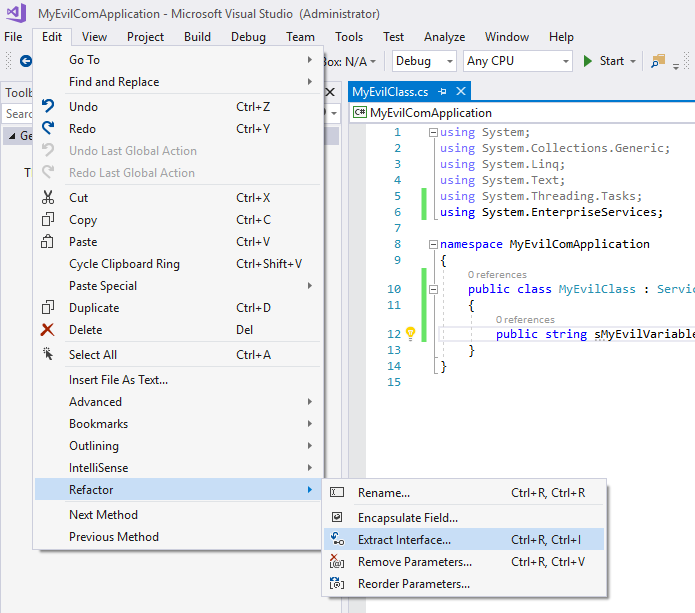
Step 4
Create an interface for your class. Make sure the cursor is within your class when choosing "Extract Interface..." from the Edit -> Refactor menu.
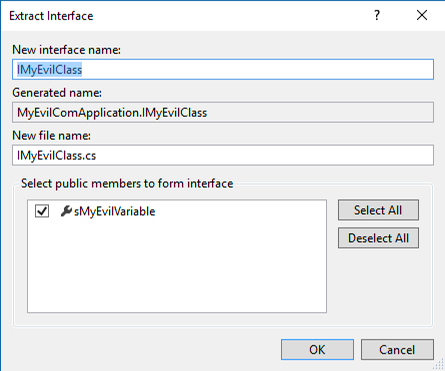
Note how extracting the interface changed your class also to inherit from the newly created interface:
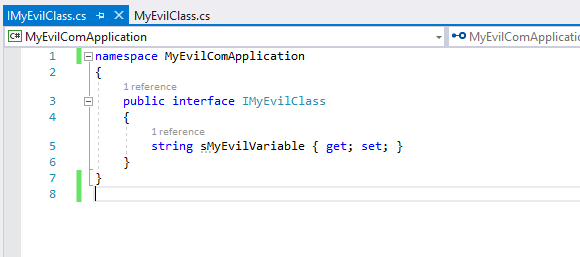
Step 5
Look at the interface. It should reflect the contents of your class including any fields or methods you have created.
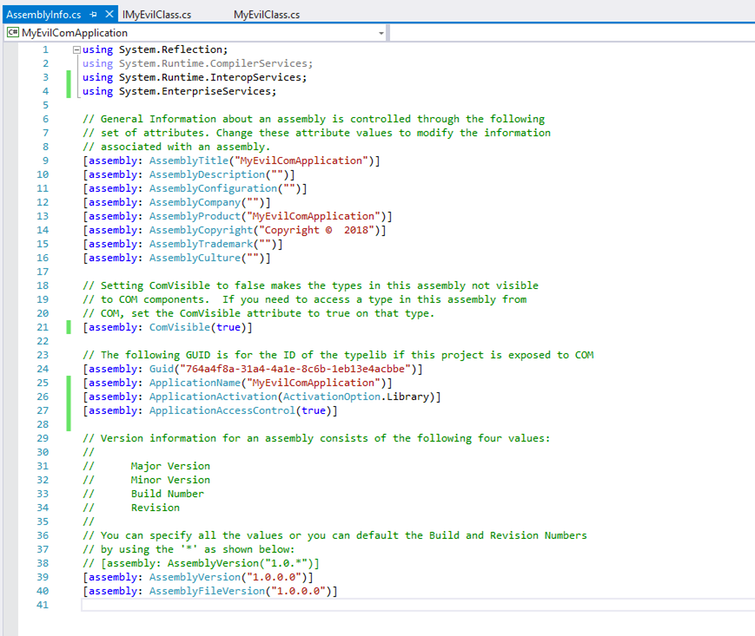
Step 6
Configure AssemblyInfo.cs:
- Set [assembly: ComVisible(false)] to true.
- Add an [assembly: ApplicationName()].
- You can also add [assembly: ApplicationActivation()] and [assembly: ApplicationAccessControl()] tags if you like. But those can also be configured after installation of the application.
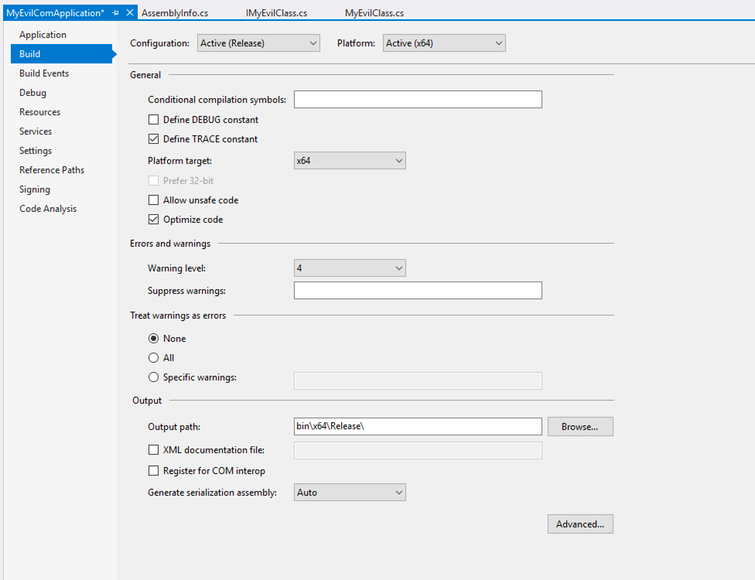
Step 7
Configure the build settings for your platform.
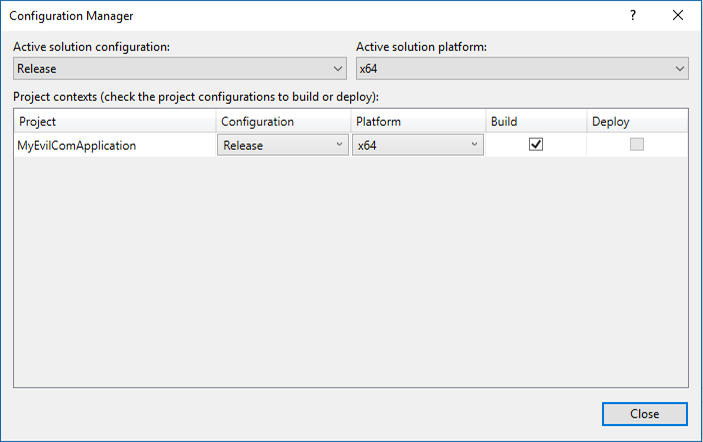
Choose the correct CPU type for your platform. You can see this reflected on the build page of the project properties.
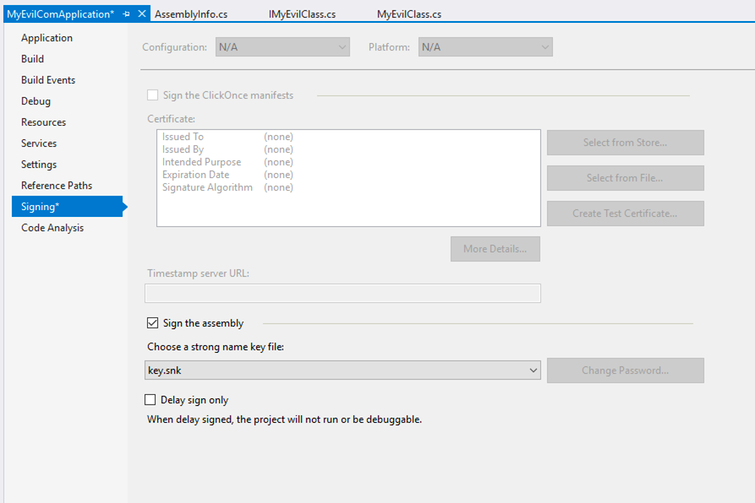
Step 8
Create a key for a strong name using the strong name tool sn.exe:
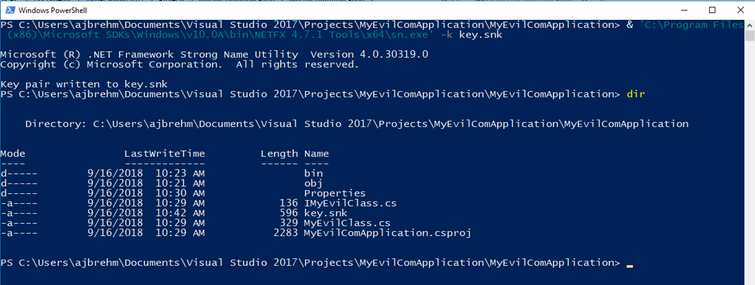
Then use this key file to sign the assembly.
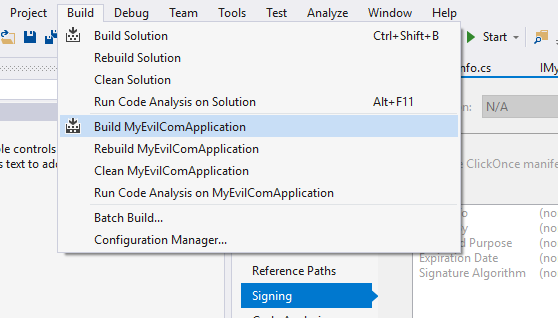
Step 9
Build the application.
Step 10
Copy the newly-built DLL to a location where it can be seen by everyone who might want to use it. Then register it with COM using RegSvcs.exe.
(If you cannot find RegSvcs.exe, it's located in C:\windows\Microsoft.NET\Framework64\v4.0.30319 or a related directory depending on system architecture and .NET version.)
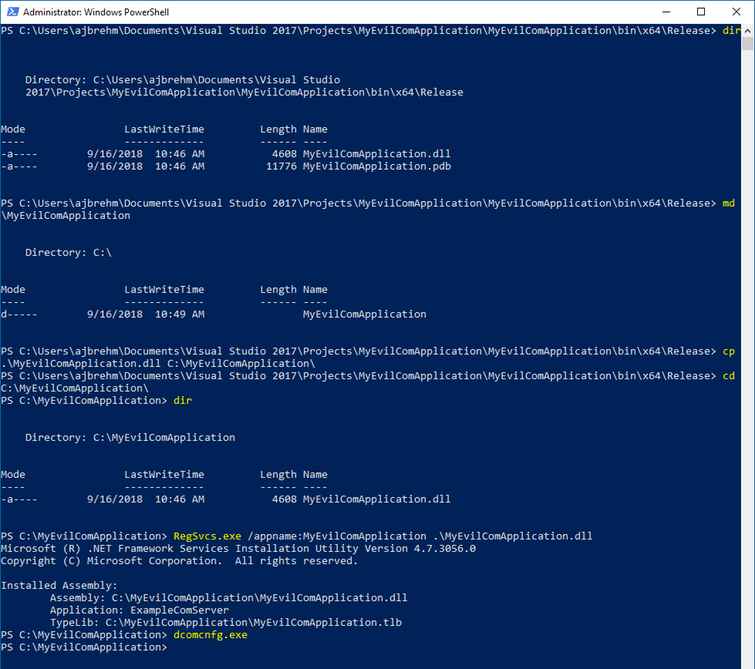
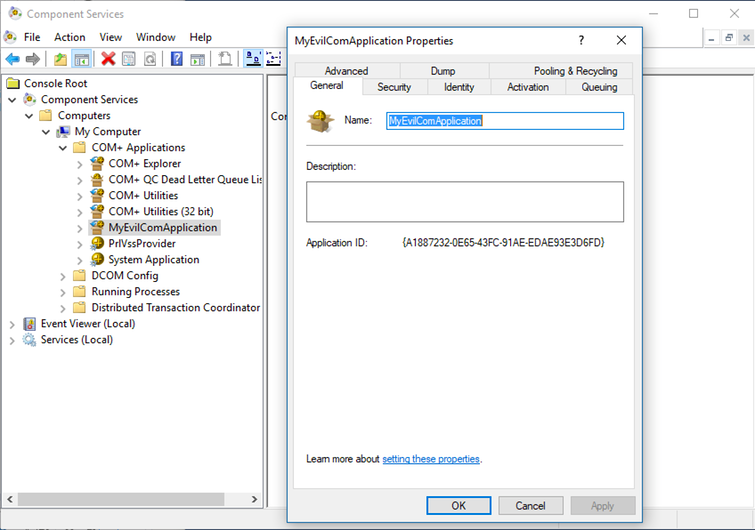
Start dcomcnfg.exe immediately to look at the result.
Step 11
Use the class.
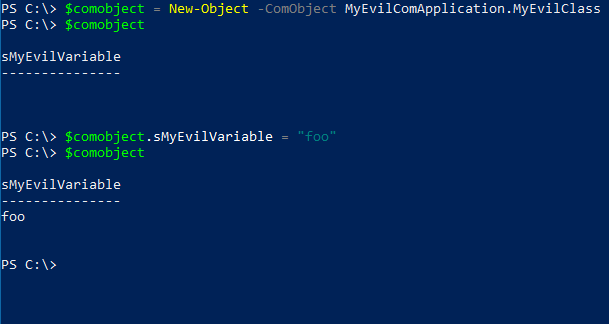
It's not doing great things but it works.